Smithsonian Displays 3D Portrait of President Obama
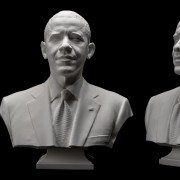
The first presidential portraits created from 3-D scan data are now on display in the Smithsonian Castle. The portraits of President Barack Obama were created based on data collected by a Smithsonian-led team of 3-D digital imaging specialists and include a digital and 3-D printed bust and life mask. A new video released today by the White House details the behind-the-scenes process of scanning, creating and printing the historic portraits. The portraits will be on view in the Commons gallery of the Castle starting today, Dec. 2, through Dec. 31. The portraits were previously displayed at the White House Maker Faire June 18.
The Smithsonian-led team scanned the President earlier this year using two distinct 3-D documentation processes. Experts from the University of Southern California’s Institute for Creative Technologies used their Light Stage face scanner to document the President’s face from ear to ear in high resolution. Next, a Smithsonian team used handheld 3-D scanners and traditional single-lens reflex cameras to record peripheral 3-D data to create an accurate bust.
The data captured was post-processed by 3-D graphics experts at the software company Autodesk to create final high-resolution models. The life mask and bust were then printed using 3D Systems’ Selective Laser Sintering printers.
The data and the printed models are part of the collection of the Smithsonian’s National Portrait Gallery. The Portrait Gallery’s collection has multiple images of every U.S. president, and these portraits will support the current and future collection of works the museum has to represent Obama.
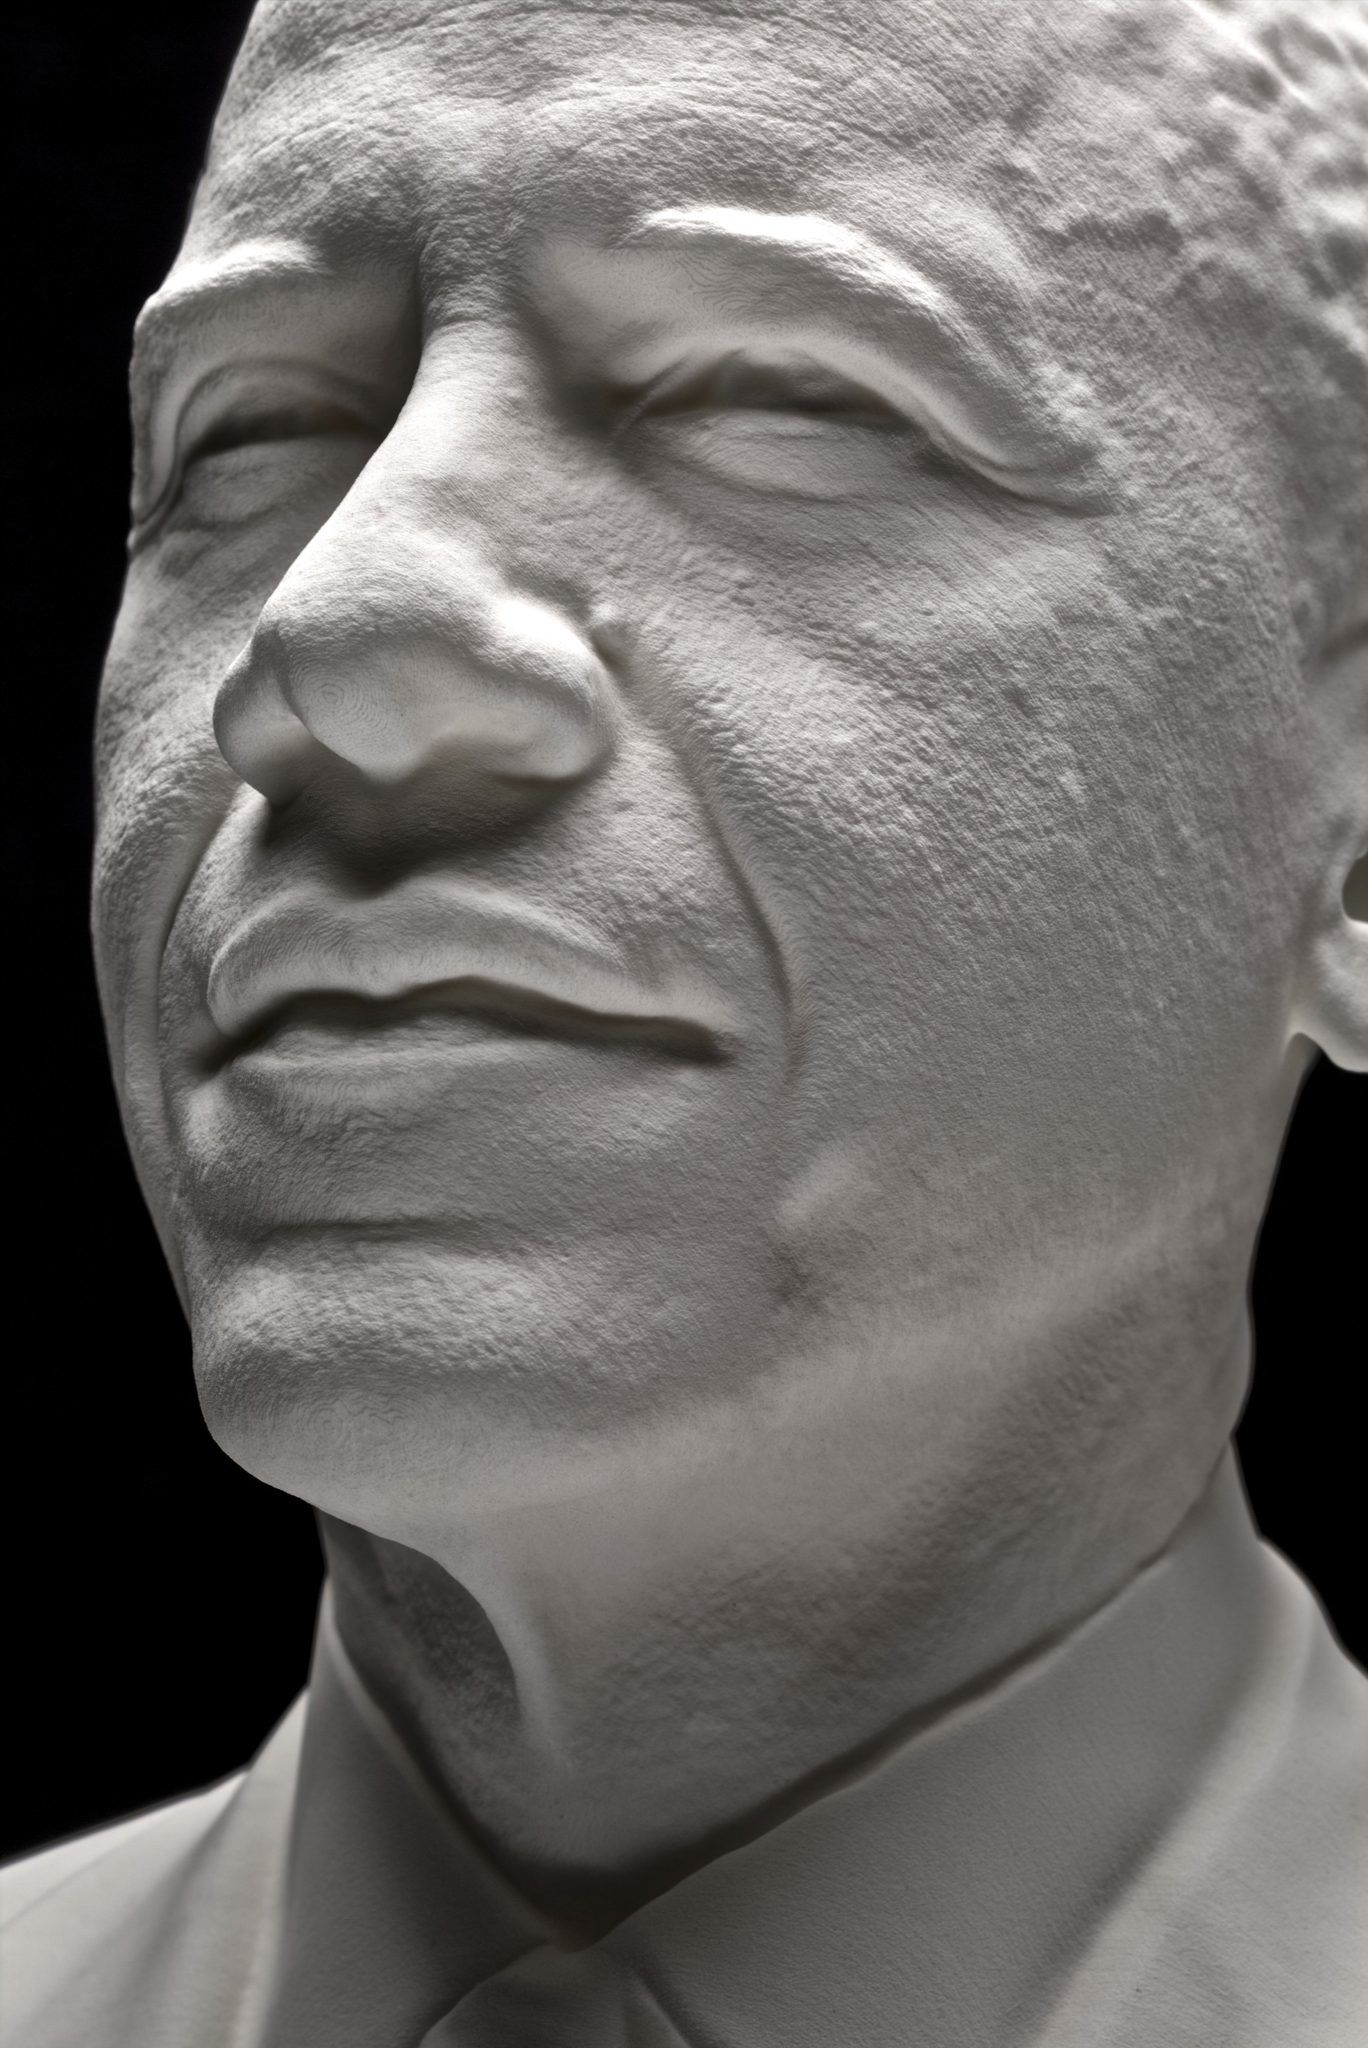
The life-mask scan of Obama joins only three other presidential life masks in the Portrait Gallery’s collection: one of George Washington created by Jean-Antoine Houdon and two of Abraham Lincoln created by Leonard Wells Volk (1860) and Clark Mills (1865). The Washington and Lincoln life masks were created using traditional plaster-casting methods. The Lincoln life masks are currently available to explore and download on the Smithsonian’s X 3D website.
The video below shows an Artec Eva being used to capture a 3D portrait of President Barack Obama along with Mobile Light Stage – in essence, eight high-end DSLRs and 50 light sources mounted in a futuristic-looking quarter-circle of aluminum scaffolding. During a facial scan, the cameras capture 10 photographs each under different lighting conditions for a total of 80 photographs. All of this happened in a single second. Afterwards, sophisticated algorithms processed this data into high-resolution 3D models. The Light Stage captured the President’s facial features from ear to ear, similar to the 1860 Lincoln life mask.
About Smithsonian X 3D
The Smithsonian publicly launched its 3-D scanning and imaging program Smithsonian X 3D in 2013 to make museum collections and scientific specimens more widely available for use and study. The Smithsonian X 3D Collection features objects from the Smithsonian that highlight different applications of 3-D capture and printing, as well as digital delivery methods for 3-D data in research, education and conservation. Objects include the Wright Flyer, a model of the remnants of supernova Cassiopeia A, a fossil whale and a sixth-century Buddha statue. The public can explore all these objects online through a free custom-built, plug-in browser and download the data for their own use in modeling programs or to print using a 3-D printer.